Adelaide

Sunday, July 14, 2013

Tutorial: How to Make a Decorated Composition Book

I have seen many examples of decorated composition books.  I have, through a process of trial and error, come up with a method that works for me and that I like best.  I have tried to come up with a step-by-step tutorial to show you how to do it too.  Keep in mind that I did this alone.  I did not have anyone to take the photos for me so, in some cases, they are not quite as clear as I'd like.  Still, I think you can get the idea.  Have fun!

Step 1: Start with a composition notebook and a glue stick.
Step 2: Glue the first three pages together.  Then, glue the next three pages together.  Then, glue the next three pages together.  You should end up with three sets of three pages each, glued together.
Step 3: I will refer to these three sets of pages as flaps: flap one, flap two and flap three.  You will now need to get your ruler and pencil.  On flap one, mark a line from the edge of the page that is as wide as your ruler.  Then put your ruler on the line you just marked and mark another line as wide as your ruler.  The second line is the line you are going to cut on.
Step 4: On the second flap, mark a line from the edge of the page that is as wide as your ruler.  This is the line you are going to cut on.
Step 5: Leave the third flap alone.  Do not make any lines, do not cut, do not passs go.......
Step 6: You should now have three flaps.  The first flap is the shortest, the middle flap is a bit longer and the third flap is the longest, kind of like steps. I put the scissors and the ruler between the flaps, to help you see the different lengths.
Step 7: Now, we will leave the flaps for a moment and work on the cover.  Select a piece of paper that you would like to use to decorate the front cover of your book.  Put glue all over the front cover, EXCEPT on the black fabric binding.  Line your paper up against the binding, leaving some paper at the top and the bottom of the cover to fold over.  Glue it on.
Step 8: Now, we are going to make a mitered corner.  You need to cut the three edges of the paper that are not glued down, as shown in the picture below.
Step 9: Now, fold the three edges over so that you can see them on the inside of your cover, then glue them down.
Step 10: Now, we are going back to our three flaps.  We are going to use the flaps to make a set of pockets in our book.  We are going to start with Flap 3, the longest flap, the one at the back of the three flaps.  Take a piece of paper that you want to use to decorate flap three with.  Line it up so that the bottom of the paper is even with the bottom of the book and draw a line on the back where the top of the book goes across the paper.
Step 11: Cut the paper along the line, fold over a small flap and glue that to the front of flap three -- the front is the side of flap 3 that is closest to the front of the book.

Step 12: glue the other part of the paper to the back of flap 3.
Step 13: Now we move to flap 2, the middle flap.  For this one, you can use a smaller piece of paper, so if you have a scrap you want to use up, now's the time.  Fold a small flap and glue it to the back of flap 2.  The back is the side of flap 2 that faces the back of the book.  The glue the larger part of the paper to the front of flap 2, which is the part of flap 2 that faces the front of the book.

Step 14: Now, for the front flap.  Take a piece of paper that you want to use to decorate flap one.  Fold over a small edge and glue it onto the back of flap one.
 
Step 15: Now, fold the rest of the paper to the front of flap one. 
Step 16: You are going to glue the rest of the paper to flap one.  When you get to the binding in the middle of the book, you need to put a LOT of glue there so that the paper will stick well.  I've used a purple colored glue stick in the picture to show you what I mean.
Step 17: Keep gluing the paper down and press it really well into the crack at the binding.
Step 18: Then, finish gluing the rest of that paper down.  Now, we are going to take our three flaps and make pockets out of them.  Line your ruler up at the bottom of flap one, so that the 5 inch mark is on the edge of flap one.  Make a little dot at inches 1, 2, 3, 4, 5 1/2, and 6 1/2. 
Step 19: Punch holes in flap one where you made the marks.  Only do one flap at a time, or your punch will break.  After you punch your holes, use your pen/pencil to color in the holes so that they show on flap two.  The holes will be in all three flaps and they MUST line up for the pockets to work.
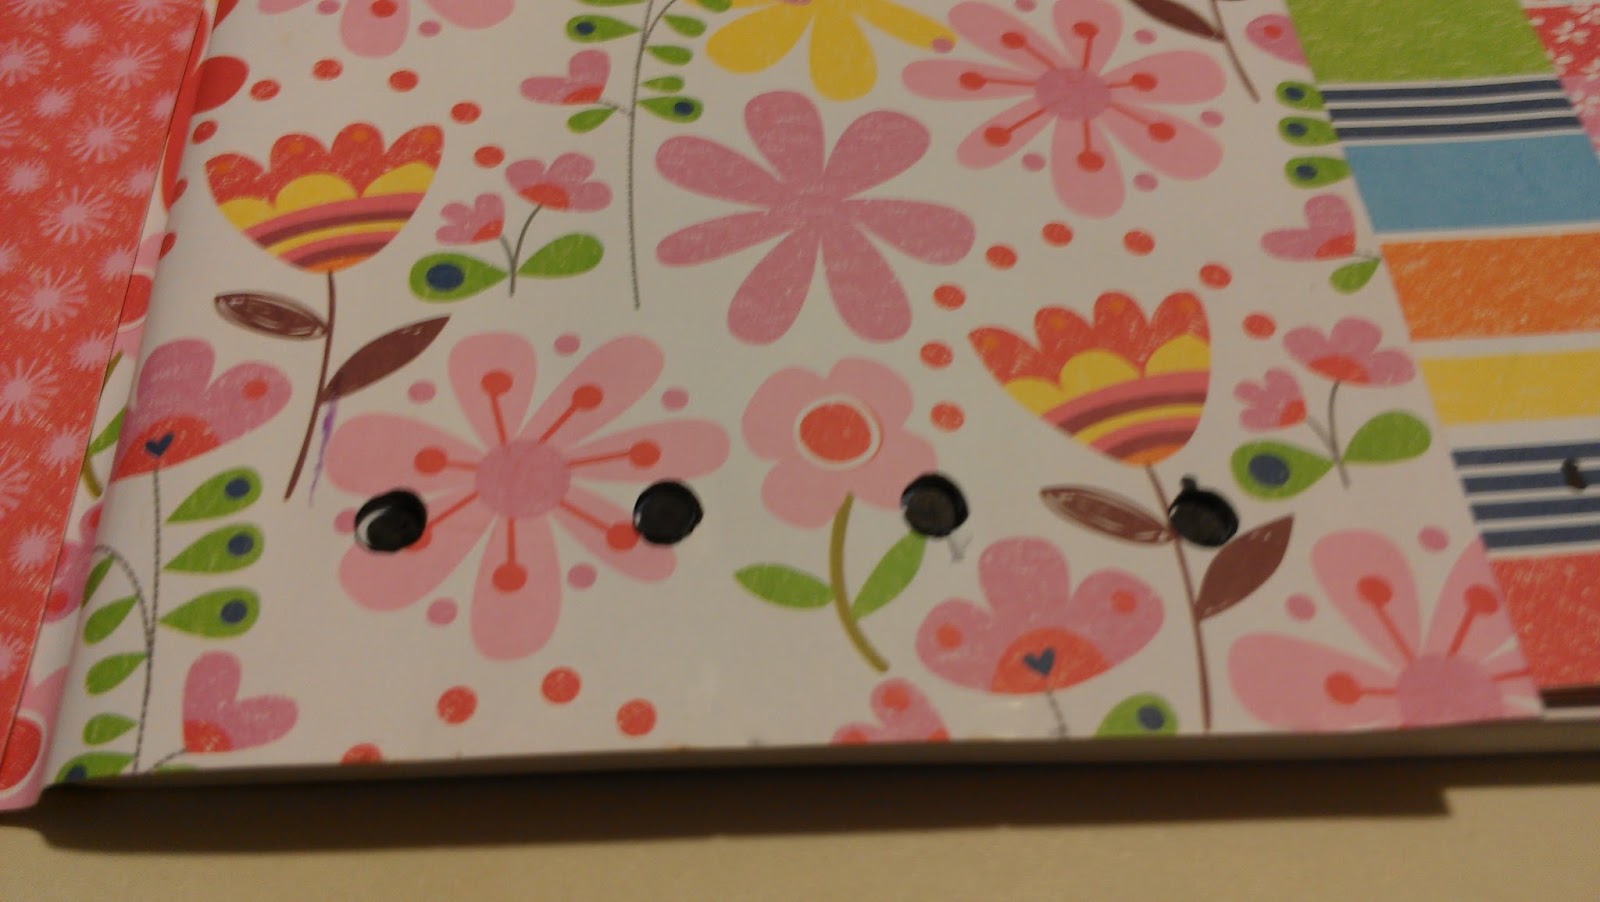
Step 20: Turn to flap two and punch the holes right where you made your marks.  Then, mark through those holes onto flap three.  Turn to flap three and punch the holes.  You should now have holes in all three flaps, that line up.
(Actually, that top photo shows the dots on flap two.  The bottom one shows all three flaps with the holes in them.)
Step 21: Mark the same places on the top of the flaps and punch the holes so that you have matching holes in all three flaps, top and bottom.  Then, get your narrow ribbon and start threading it through the first hole, closest to the edge of the pages.  Thread it from the back to the front.
Step 22: You want to pull through about 8 or so inches of ribbon and keep threading it through the holes from back to front.  Remember, you are going through the holes in all three flaps.
Step 23: When you get to the hole closest to the binding of the book, turn around and go back the other way.
Step 24: When you get back to the edge, tie the ends in a small square knot. 
Step 25: Do the same to the top of the flaps, so that you have bound the top and the bottom with ribbon. 
Step 24: Now you have three pockets to put stuff in.  I've put papers in between the pockets in the next photo.
Step 25: Then, get a paper that you want to use to decorate the inside of the front cover with. Put it inside of the cover and trace around the cover to make a line on the back of the paper. This is where you will cut the paper.
 
Step 26: Cut the paper and glue it to the inside cover.

 
Step 27: Now cover the back cover of your notebook and the inside back cover, just as you did the front cover.  Then, all that is left is for you to decorate your book!  Here are some examples of books I have done:


 Notice that, on this book, I divided it into sections.  I glued three pages together to make a flap to separate the sections.  I put tabs on the flaps, too.

This is a book I did on the color green.  On the inside, I put all kinds of green things.  I attached a ribbon at the top and used a green emery board as a book mark!

 
You can do anything you want to with these!  Have fun!
 
Please, please, PLEASE!  If you have read through this entire tutorial, PLEASE leave a comment for me.  Please let me know if it makes sense, if you like it, if you are going to try it, or anything else you want to say.  I want to start doing more craft tutorials on this blog.  Please give me your honest feedback.  Thank you!


1 comment:

  1. Wow. This is amazing! I took a book arts class and we made a book that looked something like this idea, but you are way more thorough!!

    ReplyDelete